


{Pssst…find the full reveal of the finished nursery here!}
For weeks and weeks, I’ve been stumped on an ottoman for the nursery. But I finally figured out a solution! Because I have no patience, I’ll show you the end result first and then share my saga of how I got there.

It is completely DIY and cost me less than $10. True story!
I originally wanted to make something like this fabric stuffed ottoman has seen in Graham’s Fabric Fabulous Nursery and made using this tutorial:

Then I considered knitting my own pouf to copy this CB2 piece and other more expensive versions. The DIY tutorial seemed very easy, and the results looked nice…

But I was questioning how well I could do either, and what to use for the stuffing was stumping me. What stuffing would be solid enough to hold some weight?
And how would the stuffing look smooth and not bumpy? I’m sure it can be done, but I wasn’t convinced on either option. And our nursery budget is near the bottom, so filling an ottoman with duvets (as suggested by the pouf tutorial) was expensive.
Then I had a brainstorm. Usually, that happens if I wait long enough.
At a local discount store (called Marden’s for those of you who might live in Maine or close enough to get to one) they always have random piles of foam. I remembered seeing small circles and square foam pieces, so I walked in to see what I could find.
As the store’s slogan goes, “You should have bought it, when you saw it, at Marden’s,” which basically means you are likely never to see something again if you don’t just buy it the first time. So naturally, I was nervous that they would never have the foam in stock again.
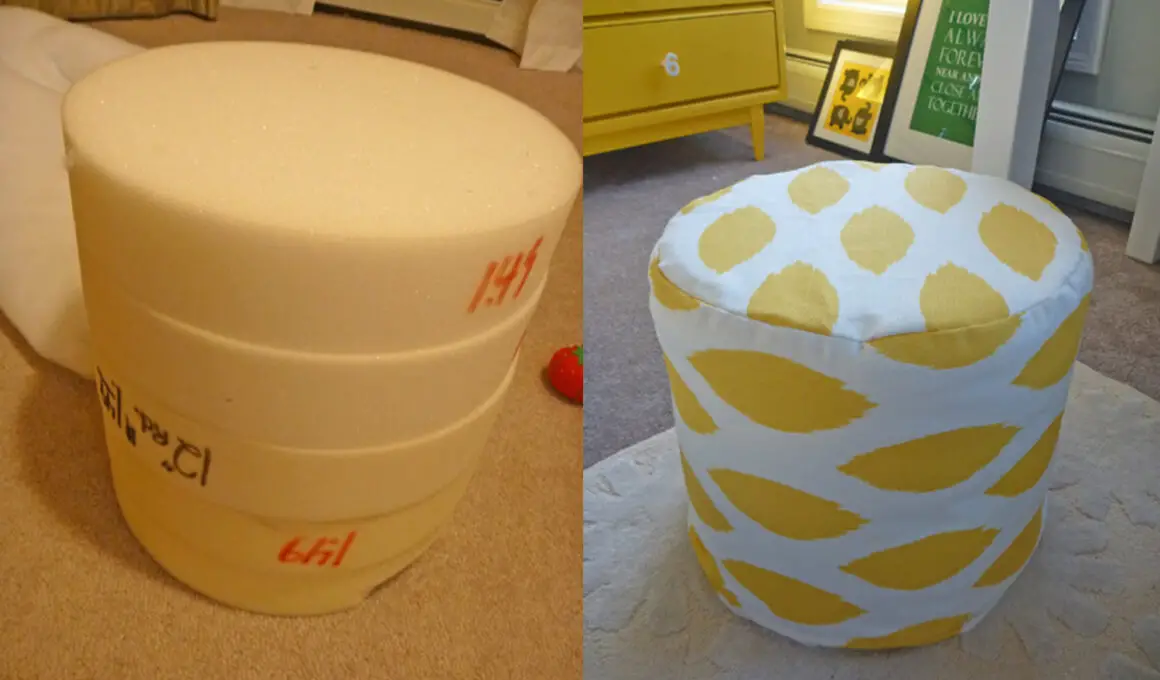
But, it was my lucky day. I found precisely five 12″ round circles (excuse the bad lighting)!

I left the stack just as it is and wrapped it with some left over quilt batting that I had on hand. I wrapped the batting around and then used a few straight pins to keep it stuck to the foam.
I left a couple of inches at the top so that the ottoman would have more of a curved edge once the fabric was over it. Sorry that I don’t have pictures for the rest. I was moving quickly and forgot to keep the camera close by!
As far as the cover, I simply traced one of the foam rounds and added an inch all the way around for a seam allowance. Then I cut a rectangle that was as tall as the foam and long enough to wrap around, and hemmed the bottom and one short side.
Next, I sewed the rectangle to the circle, popped it over the foam/batting, and then used sticky-backed velcro to secure the seam (that way it can be removed and washed). The fabric and velcro were left over from my DIY crib skirt , so this was really a low-cost project!
And here it is again–my cheap DIY ottoman:

And if you are wondering where the ottoman will go, it will be used with the chair currently being re-covered. I have two cushion covers made, now I need to make a slipcover for the base. And I have 5.5 weeks left.