

Table of Contents Show
I know the satisfaction that comes from putting together a project, especially when it’s a part of the home you cherish. As an experienced homeowner and a contractor, I’ve been fortunate enough to be a part of countless home projects. Over the years, one question that keeps popping up from both clients and friends is: “How do you stabilize a half wall on concrete floors?”
Concrete floors can be a challenge, especially when it comes to ensuring stability. That wobbly half-wall might seem like a minor annoyance today, but it can quickly become a safety concern if left unattended.
This guide aims to address that very challenge. Through years of hands-on experience, I’ve gathered tried-and-true techniques to make sure your half-wall stands firm and strong.
Whether you’re looking to add a stylish division to your living space or need a functional partition for your office, a half-wall can be the perfect solution. But it’s essential to get the fundamentals right – starting with its stability. Stick with me through this guide, and we’ll walk through the steps to make sure your half wall on concrete floors is as stable as it is stylish.
Common Issues with Half Walls on Concrete Floors
Half walls, while offering aesthetic and functional benefits, come with a set of challenges when placed on concrete floors. One of the most common problems homeowners and contractors face is the dreaded wobble. No one wants to lean against a wall or place something on its ledge only to have it shake or tilt precariously.
The Problem of Wobbling or Instability
The underlying reason for a wobbly half wall on concrete floors often stems from an inadequate anchoring system. Concrete, by nature, doesn’t have the same “give” as wooden floors.
This means that any slight misalignment or imbalance is accentuated, leading to a noticeable wobble. Furthermore, over time, as the house settles or undergoes changes in temperature and humidity, these instabilities can be exacerbated.
Potential Dangers of an Unstable Half Wall
An unstable half-wall is not just an aesthetic issue; it’s a genuine safety concern. Picture this: a child leaning against a wall that suddenly gives way or a valuable piece placed on the ledge tumbling down. These scenarios are not just hypotheticals.
According to a study published in the Injury Prevention Web Journal, household accidents involving unstable structures, including walls and furniture, have been responsible for significant injuries, especially among children and the elderly.
Ensuring the stability of half walls, particularly in homes with vulnerable populations, is thus not just about aesthetics but is paramount for safety.
Tools and Materials Needed
Embarking on a project to stabilize your half wall on a concrete floor? Equipping yourself with the right tools and materials from the outset can make the process smoother and more efficient. Here’s a handy list to ensure you’re well-prepared:
Essential Tools
- Masonry Drill: A specialized drill designed to bore holes into tough materials like concrete. It’s crucial to have one of these to anchor your half-wall effectively.
- Hammer: To help insert the concrete anchors and make minor adjustments during the process.
- Level: This ensures your half wall is perfectly horizontal. A good level can make the difference between a wall that looks professionally installed and one that’s noticeably off-kilter.
- Measuring Tape: Accurate measurements are the key to any successful construction project. This will help ensure your anchors are placed at the right intervals.
- Pencil or Marking Chalk: To mark drill points on the concrete floor.
- Safety Goggles and Gloves: Concrete drilling can create dust and debris, so it’s essential to protect your eyes and hands.
Materials
- Concrete Anchors: These are special fasteners designed for use in concrete. They’ll ensure your half wall is securely attached to the floor.
- Construction Adhesive: A strong bonding agent that works well with concrete. It adds an extra layer of security, making sure the base of your half-wall sticks firmly to the floor.
- Masonry Drill Bits: These are specifically designed to drill into hard surfaces like concrete. Ensure they match the size of your concrete anchors.
- Screws or Bolts: To attach the half wall to the concrete anchors. Make sure they’re the right size for your anchors and are made of rust-resistant material.
- Shims: Thin pieces of material (often wood or plastic) that can be used to level out any minor imbalances in the half wall.
With the right tools and materials at your disposal, you’ll be well on your way to having a sturdy and stable half-wall on your concrete floor.
Step-by-Step Guide to Stabilizing a Half Wall on Concrete Floors
Before you start drilling holes or applying adhesive, it’s crucial to do some groundwork. Proper preparation not only makes the stabilizing process smoother but also ensures the longevity and safety of your half-wall.
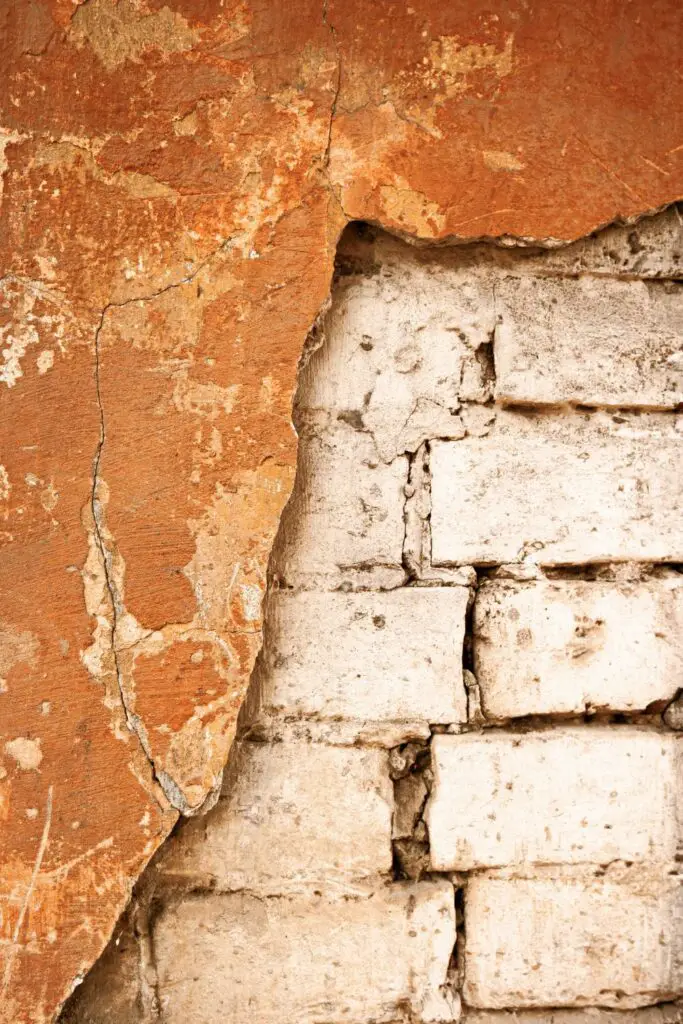
Checking the Wall for Any Damage or Weak Points
Visual Inspection
Start with a basic visual scan of your half wall. Look for any cracks, gaps, or signs of wear. Pay close attention to the base where the wall meets the floor, as this is where most stability issues originate.
Gently push against different parts of the wall to gauge its stability. This can help identify any areas that might be more unstable than others. Remember, the aim is to ensure the entire wall is sturdy, not just parts of it.
Check for Hollow Points
Sometimes, the inside of the half wall may have hollow or weak points, which can compromise its integrity. You can tap along the wall with your knuckles. A solid sound indicates a well-built section, while a hollow sound may suggest a potential problem area.
Cleaning the Base Area Where the Half Wall Meets the Concrete
Remove Dust and Debris
Start by sweeping or vacuuming the base area to remove any loose dust or debris. This ensures a clean working surface, which is vital for proper adhesion and anchoring.
Wash the Surface
Use a damp cloth or sponge with a mild detergent to clean the base area. This helps remove any grease, grime, or residues that might interfere with the adhesive or anchoring process.
Let it Dry
It’s important to ensure the area is completely dry before proceeding. Any residual moisture can affect the efficiency of the construction adhesive and the setting of the concrete anchors.
Mark the Anchor Points
Using your pencil or marking chalk, identify and mark the points where you’ll be drilling to insert the concrete anchors. This is especially important if your half wall is longer, as you’d want evenly spaced anchors for uniform stability.
Preparation might seem like a time-consuming step, but it’s a cornerstone to ensuring the stability of your half wall on a concrete floor. With a well-prepped base, you’re setting yourself up for success in the following stages.
Anchoring to The Concrete
Anchoring is the heart of stabilizing your half-wall. It ensures that the wall is firmly connected to the concrete floor, providing the necessary support and stability. Here’s a detailed guide on how to anchor your half wall to a concrete floor:
How to Choose the Right Concrete Anchors for the Job
- Assess the Load: Consider the weight and the expected load on the half wall. For walls with more substantial loads or in high-traffic areas, you’ll need stronger, heavy-duty anchors.
- Material Compatibility: Ensure that the anchor material is compatible with the half wall’s material.
- Depth of the Concrete: The thickness of your concrete floor determines the length of your anchor.
- Types of Anchors: There are various types, like sleeve anchors, wedge anchors, or drop-in anchors.
Drilling into the Concrete: Tips and Precautions
- Wear Safety Gear: Always wear safety goggles and gloves to protect yourself from concrete dust and debris.
- Use a Masonry Drill Bit: Ensure the bit size matches the diameter of your chosen anchor. This ensures a snug fit for the anchor.
- Maintain a Steady Speed: When drilling, keep the drill at a consistent speed. Drilling too fast can cause the bit to overheat or the concrete to crack.
- Depth is Key: Mark your drill bit with a piece of masking tape to indicate the depth you need to drill. This ensures you don’t drill too shallow or too deep.
- Clear Out Dust: After drilling, remove any concrete dust from the hole using compressed air or a vacuum. This ensures a clean fit for the anchor.
Installing Anchors and Ensuring They Are Secured
- Insert the Anchor: Place the anchor into the drilled hole, ensuring it sits flush with the concrete surface.
- Hammer It In: For types like sleeve or wedge anchors, gently tap them in using a hammer until they are snugly fit.
- Tighten Securely: Depending on the anchor type, you might need to tighten a bolt or screw at the top. Ensure it’s tight, but be cautious not to overtighten as that can damage the half wall or the anchor itself.
- Test Stability: Once all anchors are installed, give your wall a gentle push to ensure it’s stable. If there’s any wobble, recheck your anchors.
Anchoring is a fundamental step in stabilizing your half wall on concrete floors. With the right anchors and a careful installation process, you’re laying a solid foundation for a wall that’s both safe and enduring.
Applying Construction Adhesive
While anchors provide the primary means of securing your half wall to the concrete, construction adhesive adds an extra layer of bonding, ensuring that the wall remains stable even under stress. Let’s delve into the role of adhesive in the stabilization process:
The Importance of Adhesive for Added Stability
- Enhanced Bonding: Adhesives create a continuous bond between the half wall’s base and the concrete floor, filling in any minor gaps or imperfections that might exist.
- Distribute Stress: The adhesive spreads the load and stress evenly across the wall’s base. This reduces the risk of any single point bearing too much pressure, which could lead to failure.
- Vibration Dampening: Construction adhesive can also help dampen vibrations, preventing the wall from shaking or wobbling when subjected to external forces.
Choosing the Right Adhesive for Concrete Surfaces
- Compatibility with Materials: Ensure the adhesive is suitable for both concrete and the material of your half wall (e.g., wood, drywall).
- Weather Resistance: If the half wall is in a location exposed to moisture or temperature fluctuations, opt for an adhesive that’s resistant to these factors.
- Setting Time: Different adhesives have varying setting times. For faster project completion, you might want an adhesive that sets quickly. However, ensure it provides enough time for adjustments during application.
Application Process and Drying Time
- Clean the Surface: Just as you did before anchoring, ensure the base of the half wall and the concrete floor are clean and free from dust or debris.
- Apply Generously: Using a caulking gun or a spatula, apply the adhesive generously along the base of the half wall. Ensure an even spread, covering the entire surface that will be in contact with the concrete.
- Press Firmly: Once the adhesive is applied, press the half wall firmly onto the concrete. This ensures good contact and helps spread the adhesive evenly.
- Wipe Away Excess: Use a damp cloth to wipe away any adhesive that oozes out from the sides for a clean finish.
- Allow to Dry: The drying time can vary depending on the adhesive brand and type. Generally, most construction adhesives will require 24 to 48 hours to cure fully. Avoid putting any excessive load or stress on the wall during this period.
Incorporating construction adhesive into your stabilization process provides an added assurance that your half-wall will stand the test of time, giving you peace of mind and a sturdy, safe partition.
Reinforcing the Half Wall’s Frame
While anchoring and adhesive are essential to ground-level stability, the frame of the half wall itself plays a vital role in its overall sturdiness. A reinforced frame ensures that the wall can handle stress, weight, and wear over time without succumbing to instability. Let’s look at how you can bolster your half-wall’s frame:
Using Additional Studs or Braces
Identify Weak Points
Before adding reinforcements, it’s crucial to identify areas that may be weaker or more vulnerable to stress. These are usually the points where you’ll want to add extra support.
Add Extra Studs
By placing additional studs within the wall, you spread out the weight and stress more evenly. This can be particularly helpful in wider half walls where there’s more space between existing studs.
Incorporate Cross-Bracing
Cross-braces, typically diagonal braces that span between two vertical studs, can greatly improve the wall’s resistance to lateral forces. They help distribute pressure and prevent the wall from swaying side to side.
Use Metal Brackets
At critical joints or connections within the frame, consider using metal brackets or plates. They reinforce these joints, ensuring they don’t come apart under stress.
Attaching the Top Plate Securely
Choose a Sturdy Top Plate
The top plate acts as the cap of your half wall, and it’s essential to choose one made of robust, durable material. Whether you’re using wood or metal, ensure it’s of good quality.
Secure with Screws or Nails
Fasten the top plate to the rest of the frame using screws or nails. Make sure they penetrate deeply into the studs below for a solid connection.
Apply Adhesive
Just as with the base, applying a bead of construction adhesive between the top plate and the studs can enhance the bond. This adhesive layer can dampen vibrations and ensure the top plate remains firmly in place.
Check for Level
After attaching the top plate, use your level to ensure it sits perfectly horizontally. Any tilt or imbalance can make the entire wall look off and also affect its stability.
Reinforcing your half-wall frame is like giving it a robust backbone. By ensuring the frame is robust and well-connected, you not only enhance the wall’s stability but also extend its lifespan, ensuring it serves you reliably for years to come.
Finishing Touches
Once the half wall is securely anchored and reinforced, the final steps are all about aesthetics and ensuring the wall blends seamlessly with the rest of your interior. These finishing touches not only enhance the wall’s appearance but also offer a layer of protection. Here’s how you can give your half-wall a polished finish:
Filling Any Holes or Gaps with Filler or Caulk
- Choose the Right Filler: Depending on the material of your half wall, select a filler that’s compatible. Wood filler is excellent for wooden walls, while a general-purpose filler will work for most other types.
- Application: Use a putty knife to press the filler into any holes or gaps. Ensure the filler is slightly overfilled to account for any shrinkage as it dries.
- Smooth the Surface: Once applied, smooth out the filler using the putty knife or a damp cloth, ensuring it’s level with the wall’s surface.
- Caulk for Larger Gaps: If there are larger gaps, especially at the base where the wall meets the floor, use caulk. Apply a bead of caulk and then smooth it out using a caulk tool or your finger for a neat finish.
Painting or Finishing the Wall to Match the Interior
1. Prep the Surface
Before painting, lightly sand the wall, especially areas where filler was applied, to ensure a smooth surface. Wipe away any dust with a damp cloth.
2. Primer is Key
Apply a primer to the wall, especially if it’s newly constructed or if you’re making a significant color change. Primer helps the paint adhere better and provides a more even finish.
3. Choose the Right Paint
Select a paint that matches or complements the rest of your interior. Whether you’re going for a matte, semi-gloss, or glossy finish, ensure it’s a high-quality paint for durability and a beautiful finish.
4. Application
Use a roller for the broad surfaces and a brush for the edges and corners. Apply the paint in thin, even coats. Depending on the paint and color, you might need two or more coats to achieve the desired finish.
5. Protective Finishes
If your half wall is made of wood or another material that can benefit from protection, consider applying a clear sealant or varnish. This adds a layer of protection against scratches, moisture, and other potential damages.
Completing these finishing touches ensures your half wall doesn’t just stand sturdy but also looks impeccable. It’ll be a functional and aesthetic addition to your space, blending seamlessly with your interior while serving its purpose reliably.
Maintenance and Periodic Checks
A well-constructed and stabilized half wall, like any other structural element, requires periodic checks and maintenance. Regular oversight ensures that the wall remains safe, sturdy, and looks its best. Here’s a guide on how to care for your half-wall over time:
Importance of Regular Checks to Ensure Stability
- Safety First: The primary reason for periodic checks is safety. Ensuring the wall remains stable prevents accidents that could result from a collapsing or tilting structure.
- Preserving Aesthetics: Over time, wear and tear can diminish the wall’s appearance. Regular checks allow you to catch and address any aesthetic issues before they become significant problems.
- Extend Lifespan: By catching potential problems early on, you can address them promptly, ensuring that your half wall serves you reliably for a longer duration.
What Signs to Look for That May Indicate Weakening
1. Visible Cracks or Gaps
Keep an eye out for any cracks forming on the wall’s surface or gaps where the wall meets the floor. These can indicate that there’s movement or shifting, which could compromise stability.
2. Wobbling or Shaking
If the wall wobbles or shakes when lightly pushed or during daily interactions, it’s a clear sign that it’s losing its stability and needs immediate attention.
3. Loose or Protruding Anchors
Check the anchors periodically. If any of them feel loose or start to protrude from the wall or floor, they might not be holding the wall securely.
4. Signs of Moisture Damage
Especially if your wall is made of wood or a moisture-sensitive material, watch out for signs of water damage like discoloration, swelling, or a musty odor. Water can compromise the wall’s integrity.
5. Peeling Paint or Finish
While this is more of an aesthetic concern, peeling or bubbling paint can sometimes indicate underlying issues like moisture intrusion or material degradation.
6. Squeaks or Unusual Noises
If you hear any unusual sounds when interacting with the wall or even during regular days, it might indicate parts of the wall are rubbing against each other or other structural issues.
Routine Maintenance Tips
- Tighten Anchors: Every few months, check the anchors and tighten any that feel loose.
- Clean the Wall: Wipe down the wall to remove dust and prevent the buildup of grime. For wooden walls, consider an occasional polish to maintain its sheen.
- Address Issues Promptly: If you notice any of the above signs or any other issues, address them immediately. The sooner you tackle a problem, the less likely it is to escalate into a bigger, more costly concern.
Incorporating maintenance and periodic checks into your routine ensures that your half wall remains both a safe and attractive feature in your space. With a bit of vigilance and care, it will serve its purpose for many years to come.